
We all love embellishments! That's why we think you are going to love our July Crafty Space! Susan not only has a fantastic embellishment collection, but she also discovered how to utilize all those pieces as part of the decor in her craft space.
Let's meet Susan
BCO: Susan, tell us about your crafting background.
SUSAN: I have always been involved in some sort of craft or hobby. About 13 years ago, my husband and I inherited all his family’s heritage photographs, from which I decided to create scrapbooks. There was no looking back after that. I was smitten with scrapbooking and created heritage albums and various family albums.
BCO: When creating the design for your space, what was the process you followed?
SUSAN: Having been a scrapbooker for years, and outgrowing several work and storage areas, I knew I wanted to create the ultimate scrap room when a vacated bedroom became available. The first step was deciding a budget for the project. Next, I scoured the internet, books on craft organization, and scrapbook magazines for ideas and inspiration.
BCO: How did you plan the layout of your space?
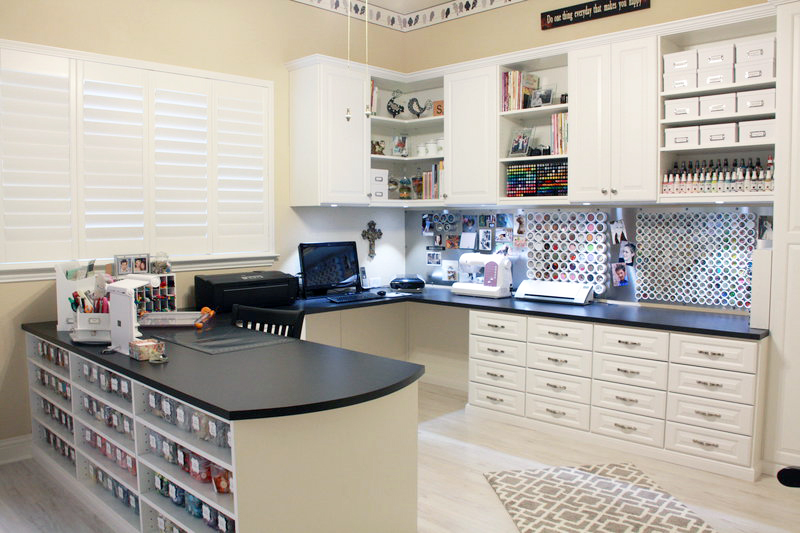
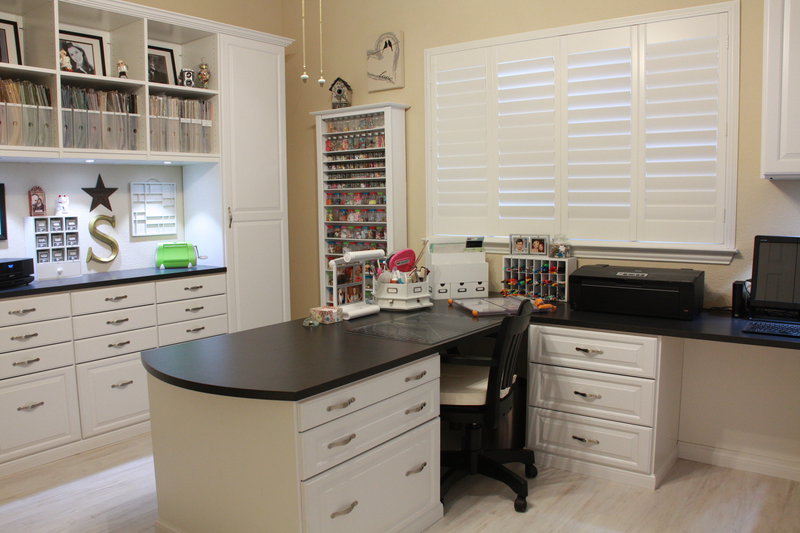
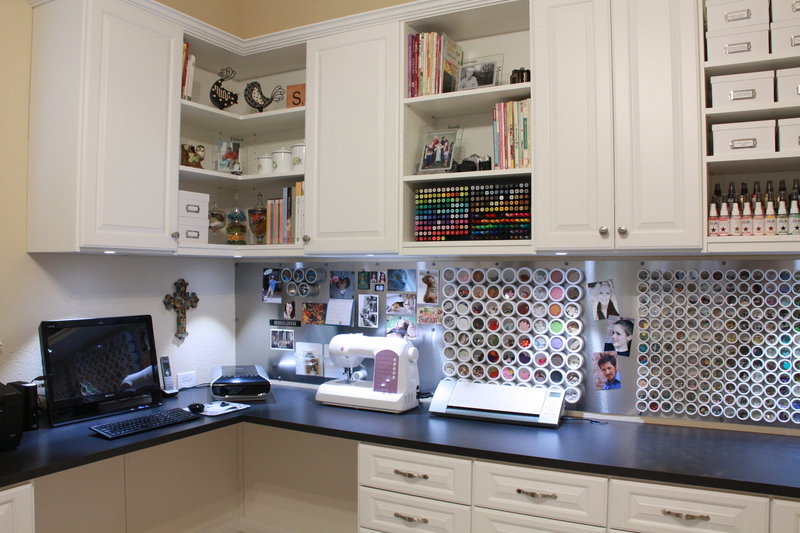
SUSAN: The first thing I thought about was how I wanted to work in the space, where I wanted to be, and how I wanted to store my supplies. I like to have my most used items within arm's reach. I designed a U-shaped area where I could turn my desk chair around and easily access my worktop, paper cutter, computer, printer, scanner, sewing machine, and digital cutter. This design gave me long stretches of counter space to spread out the materials I needed. I also gave some thought to where I would be in relation to the large window in the room so I could have the best natural light on my work area.
For the most part, I wanted a clean, precise environment, so most of my supplies are housed in closed drawers and cabinets. There are some – the prettiest things - I wanted to have visible and organized by color, like flowers, buttons, markers, and spray mists. Once all those decisions were reached, I sketched out the plans for my room and took them to a company called The Closet Factory. Their designer made working drawings of my plan and built all the cabinetry in the space.
BCO: Tell us about your color choices for the space.
SUSAN: Working with color is an integral part of the scrapbooking process. I wanted my room to have a neutral color pallet that wouldn't interfere with or influence my creative decisions. With that in mind, I went with white cabinetry and a black work surface. The black and white theme was continued with white storage boxes on the shelves, black and white décor items, a black chair, and a bench. There are pops of color in the room from the rainbow of supplies that are on open shelving.
BCO: Tell us about the button collection and embellishment jars. What a fun decor in the space!
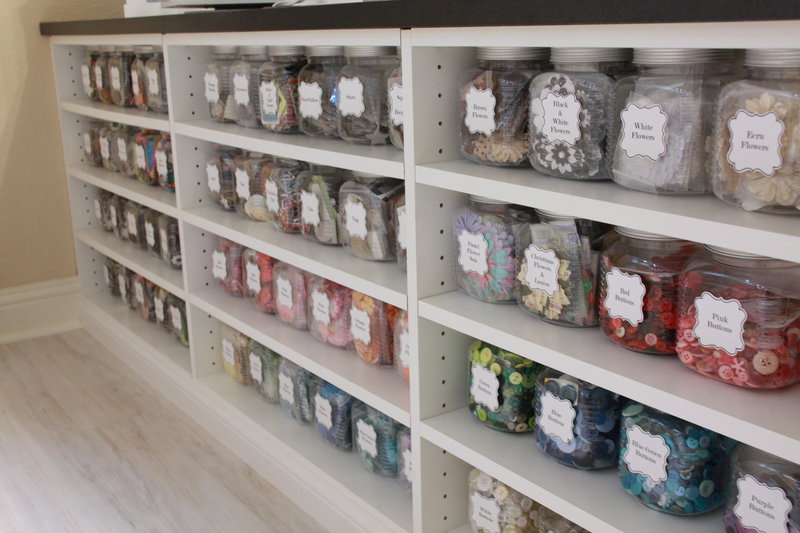
SUSAN: I already had a sizable collection of craft storage jars that I had purchased from Hobby Lobby, and I knew I wanted to have a specific place to display them. When I designed my work area, I had The Closet Factory build shelves on the front of the desk to the specific depth and height of those jars. They fit perfectly, and I arranged all the jars of buttons, flowers, and other embellishments by type and color so I can find what I need quickly.
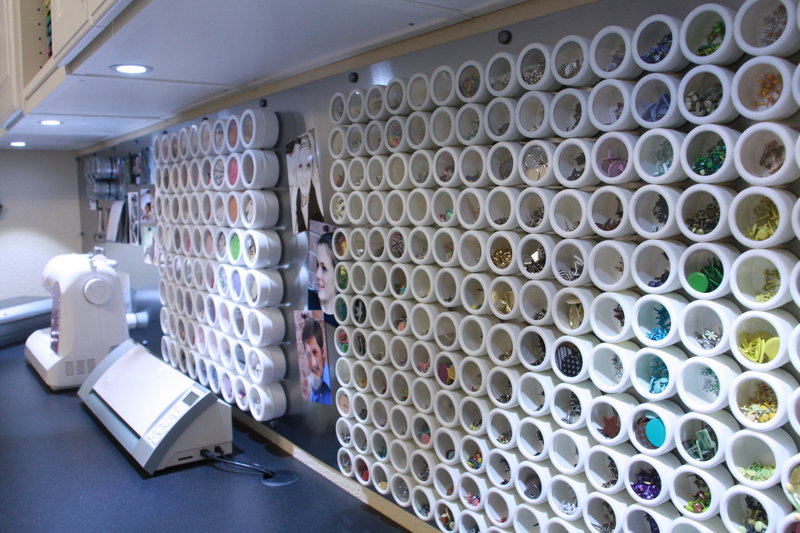
BCO: Tell us about the jars beneath your cabinets.
SUSAN: One feature I knew I wanted was a metal wall that spanned the room's length. I would use this to adhere magnetized jars filled with embellishments, plus have a place to display photographs. I did some research online and found a company that cut large metal sheets to specific sizes, so I got just what I wanted and installed it under a long wall of cabinets just above the countertop.
The little storage jars have magnets on the back, and they adhere to the metal wall I had installed above the counter. The type of embellishment inside them more-or-less organizes them, but I enjoy just scanning the contents of all of them all at once to see if something particular inspires me.
BCO: Tell us about your paper storage and how you organize your paper.
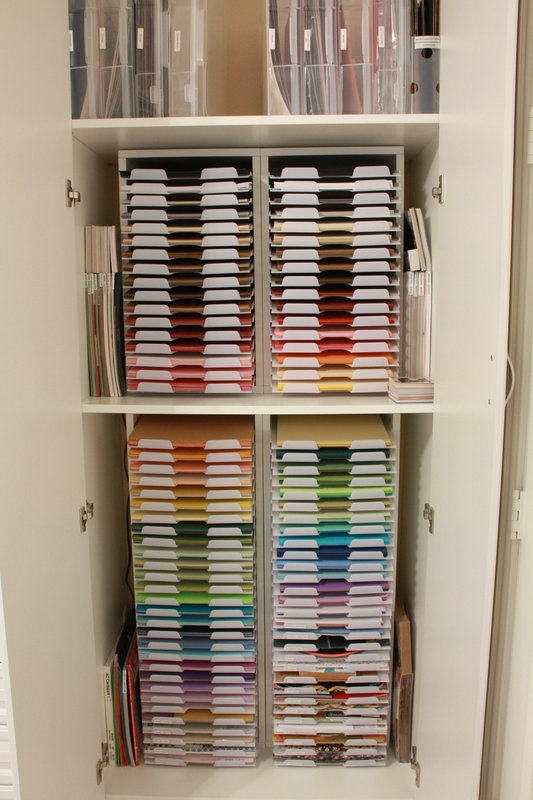
SUSAN: My paper is organized into four groups: solid color cardstock, individual sheets of paper organized by color, paper packs and tablets organized by manufacturer, and collections with a particular theme.
I purchased Best Craft Organizer's paper trays and storage cabinets for my solid color cardstock and other specialty papers. These are housed inside a larger built-in cabinet to prevent the paper from fading.
Individual sheets of paper are inside vertical Cropper Hopper paper holders and they sit on open shelving.
Tablets are on shelves inside of cabinets, arranged alphabetically by manufacturer, and shelved vertically like books. General paper collections are arranged in deep file-cabinet type drawers. Those that fit a specific theme, like holidays, military, school, etc., are in a closet inside plastic drawer units.
BCO: Which supplies were the most difficult to organize?
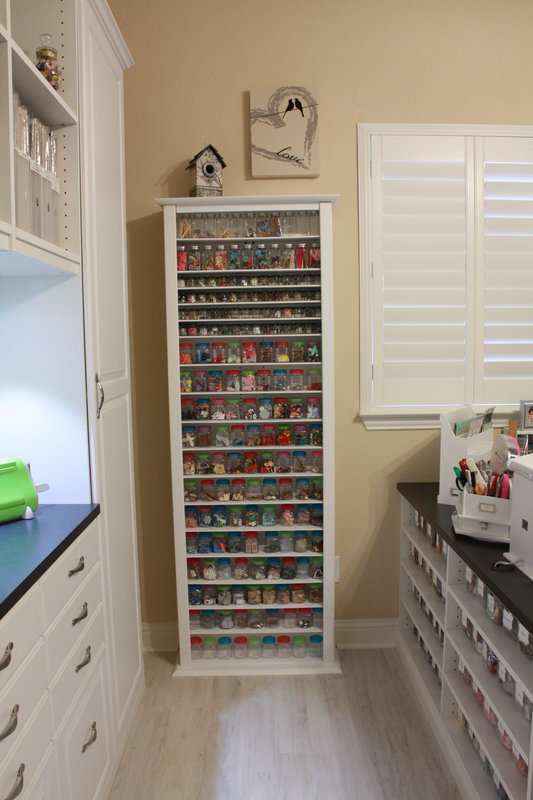
SUSAN: I would say the most complicated supplies to organize are all the small embellishments that make scrapbooking so much fun – tiny rhinestones, beads, brads, eyelets, stars, hearts, etc. I store those things in several systems because I have far too many to store in only one way. Many of my small items are in bead boxes labeled and lined up in a deep drawer. Others are in little jars on a tall CD bookcase. Others are in magnetized jars with see-through lids on my metal wall.

BCO: How has staying organized inspired your creativity?
SUSAN: I have often said, "A disorganized environment leads to a disorganized mind." And I truly believe that! I cannot possibly think clearly, plan anything, or create something worthwhile when surrounded by disarray and disorganization. It is impossible to find anything, have the space to work or clear my mind from all the distractions that clutter causes. So, I try to keep my craft room organized at all times. I put my supplies away after each project and start anew with a clean space. When I get new supplies, I immediately work them into my various storage systems so that nothing is left sitting around. I do everything to make sure that when I go to bed at night, my craft room is tidied and ready for me the next day. It makes a huge difference when I do.
BCO: If you had one organization tip to share with others creating a craft space, what would it be?
SUSAN: Don't rush into creating your craft space. Work up to it, use your supplies, and move them around, experiment with storage. You will find that some organizational systems work better than others. Some containers work better than others.
My craft room wasn't created overnight. I first started scrapbooking on the dining table and stored all my supplies in a rolling cart. Then I took over a coat closet. Finally, I had a dedicated room at my disposal. By that time, I was pretty confident that I knew what I needed, and I designed it accordingly. But, there should always be room for growth and change. Give yourself space to branch out. Explore and think creatively about your organizational needs but also look around at what other crafters have done and used to create their creative spaces.
Thank you for sharing your space with us Susan! If you would like to inspire craft organization ideas, or win a $50 Best Craft Organizer store credit, send us pictures of your craft space for a chance to be a Crafty Spaces winner!
Here are a few tips from Elphie: clean up your space, snap some photos (4 or more) from a few different angles, and include some comments about what you love about your area and your Best Craft Organizer products. You will be entered into our monthly drawing. Email your entry to elphie@bestcraftorganizer.com