Stamps and dies are essential tools for every card maker and paper crafter, offering a world of creative possibilities. Whether you are crafting a delicate floral design or a whimsical animal scene, these versatile tools cater to every occasion and theme. However, as a collection grows, so does the challenge of keeping them organized. Without a good approach, chaos can easily infringe on your craft space. With a few simple tips, you can turn chaos into order.
1. Gather all your Stamps and Dies
If you have a scattered collection of stamps and dies in your craft room, gather them all into one designated spot. As you collect your supplies, consider setting aside any stamps or dies that no longer inspire you or that you know you will not be using again. Ideally, you want to keep similar items next to each other. You can’t properly organize your collection if you don’t know what you have.
2. Begin to Sort
Organizing your stamps and dies should be personalized to your craft style - choose the process that makes the most sense for you. Choose to sort either by brand or category.
Brand:
If you choose to sort by brand, place all your stamps and dies into categories by brand. Once you have done that, you can sort all your stamps and dies into different categories (keeping them within their respective brands). For example, if you chose to sort by brand, you would put your items into categories such as Altenew, Gina K. Designs, and Lawn Fawn. Then, in each pile, you would organize by category (holiday, words, flowers, etc.).
Category:
If you are sorting by category, grab all your stamps and dies and place them in different categories. This strategy keeps all the brands together. There is no one-size-fits-all approach to organizing your stamps and dies. Do what makes the most sense for you and what helps you maximize space and organization in your craft room. As you sort into categories, use a pen and sticky notes to label each category. These do not have to be your final categories - go with your instinct. You can always change your categories later if you need to adjust. If you have an overly large pile, it is helpful to break it down into more specific categories. Such as holidays, you could sort it by Christmas, Easter, Valentine's Day, etc.
A list of suggested categories:
- Alphabets
- Animals & Pets
- Birthdays
- Borders
- Celebrations
- Christmas & Winter
- Cooking
- Easter & Spring
- Fall
- Floral
- Food
- Halloween
- Household
- Landscapes
- Love & Valentines
- Nature
- Nesting
- People
- Sentiments
- Shapes
- Sky
- Thank you
- Travel & Vacation
Stamp-n-Die Bundle Stamp-n-Die Wall Box
Decide if you want Stamps and Dies Together or Separate
Once you have sorted your stamps and dies, either by brand and then categories or just by categories, decide whether to keep your stamps and dies together or separate. If you want to keep them together, move on to the next step. If you prefer to keep your stamps and dies separate, repeat the previous step, separating stamps from dies and organizing them into different categories.
Pro Tip: If you want to keep your stamps separate from your dies, place a sticker on the outside of it to signify it has a matching set.
3. Location
Next, decide where and how to store all your beautifully sorted stamps and dies. Evaluate what type of storage will best hold your supplies. How many stamps and dies do you have? Where do you plan to store them? What do you want to store them in? Ask yourself all the storage questions.
Some of our favorite ways to store stamps and dies are by using the items below:
Mix and match these storage solutions to suit your needs. The Magnet Cards are perfect for keeping stamps and dies together. One side has a strong magnet, while the other has a special coating for stamps to stick to. Magnet Cards can be placed in a storage pocket for easy labeling.
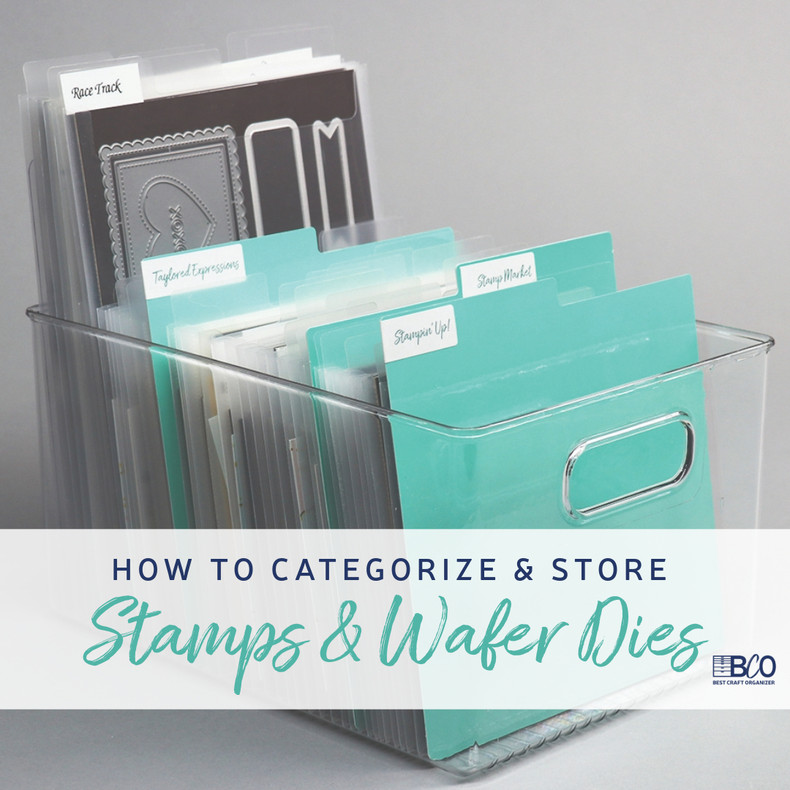
For added organization, use Crate Dividers to sort by seasons, themes, and brands, and place them in an Acrylic Crate. If you prefer a simple solution, the Stamp-n-Die Bundle keeps your stamp and die sets together and can be kept on a bookshelf. The key is to choose what works best for you and your crafting process.
4. Use Labels
Once you have everything sorted, organized, and placed in their designated spots, it is time to label them. A label maker can be a quick and easy way to label your stamps and dies. If you don’t have one, you can print labels instead. Avery.com is a great resource for customizing and printing labels. Label your items by brand, season, theme, words, flowers, food, or any category you've chosen.
5. Inventory your supplies
Another helpful tip is to keep an inventory of your stamps and dies. This serves two purposes:
- Avoiding Duplicates: Maintaining a list helps you avoid purchasing duplicate stamps and dies.
- Organizational Aid: A running list can also help you remember the categories you have organized your supplies under, although your organization system should ideally be clear and easily accessible without it.
You can keep this list in whatever way you want, either digitally or by pen and paper. Create an online document or use software such as Evernote or Notion. If you are a spreadsheet kinda person, this would be the perfect project. There are many ways to keep track of what you have, do what works best for you.


