
Every craft room is different, some are a perfect square, and others are long. You might be working with a corner, low ceilings, or a room with many windows. When creating a craft room layout, there are some tips and tricks to planning your dream craft room, with the space that you have!
Pull out your tape measures, grab your grid paper, and start designing the craft room of your dreams. Plan thoroughly and carefully, and save yourself time later on. Measure and then measure again.
Look For Inspiration
What better place to start than by gathering inspiration? Maybe you’ve seen a craft room you love from a blog you follow or maybe you saw a photo of your dream craft room on Pinterest. Looking for inspiration can be a complete room or individual elements you like. It can include colors or textiles that bring inspiration, or an organizational system to keep your supplies sorted. If you have a long and narrow space, look for craft rooms that are similar in size. Look for attics or loft craft rooms if you have a space with slanted ceilings. Open your laptop, search the internet or Pinterest for ideas you like. What would you do if you had an endless budget, unlimited space, and no restrictions? Go wild and crazy, dream big!
There’s no better place to start in the planning process than finding inspiration.
Great places to gain inspiration:
- Pinterest. An online website where you can get inspiration for projects you might want to create inspiration for projects you might want to make or how you want to organize it all. Search for inspiration by searching “Craft Room Layout”, “Craft Room Storage” or other phrases similar to those.
- Blogs. The world of blogging is full of resources. Find bloggers that have craft rooms of their own and have shared that on the internet. There are lots of blogs out there that are dedicated to crafters like you.
- YouTube. Similar to blogs, there are a lot of different crafters who have shared their expertise on YouTube. Find some videos that share craft room layouts and organization to give you some ideas.
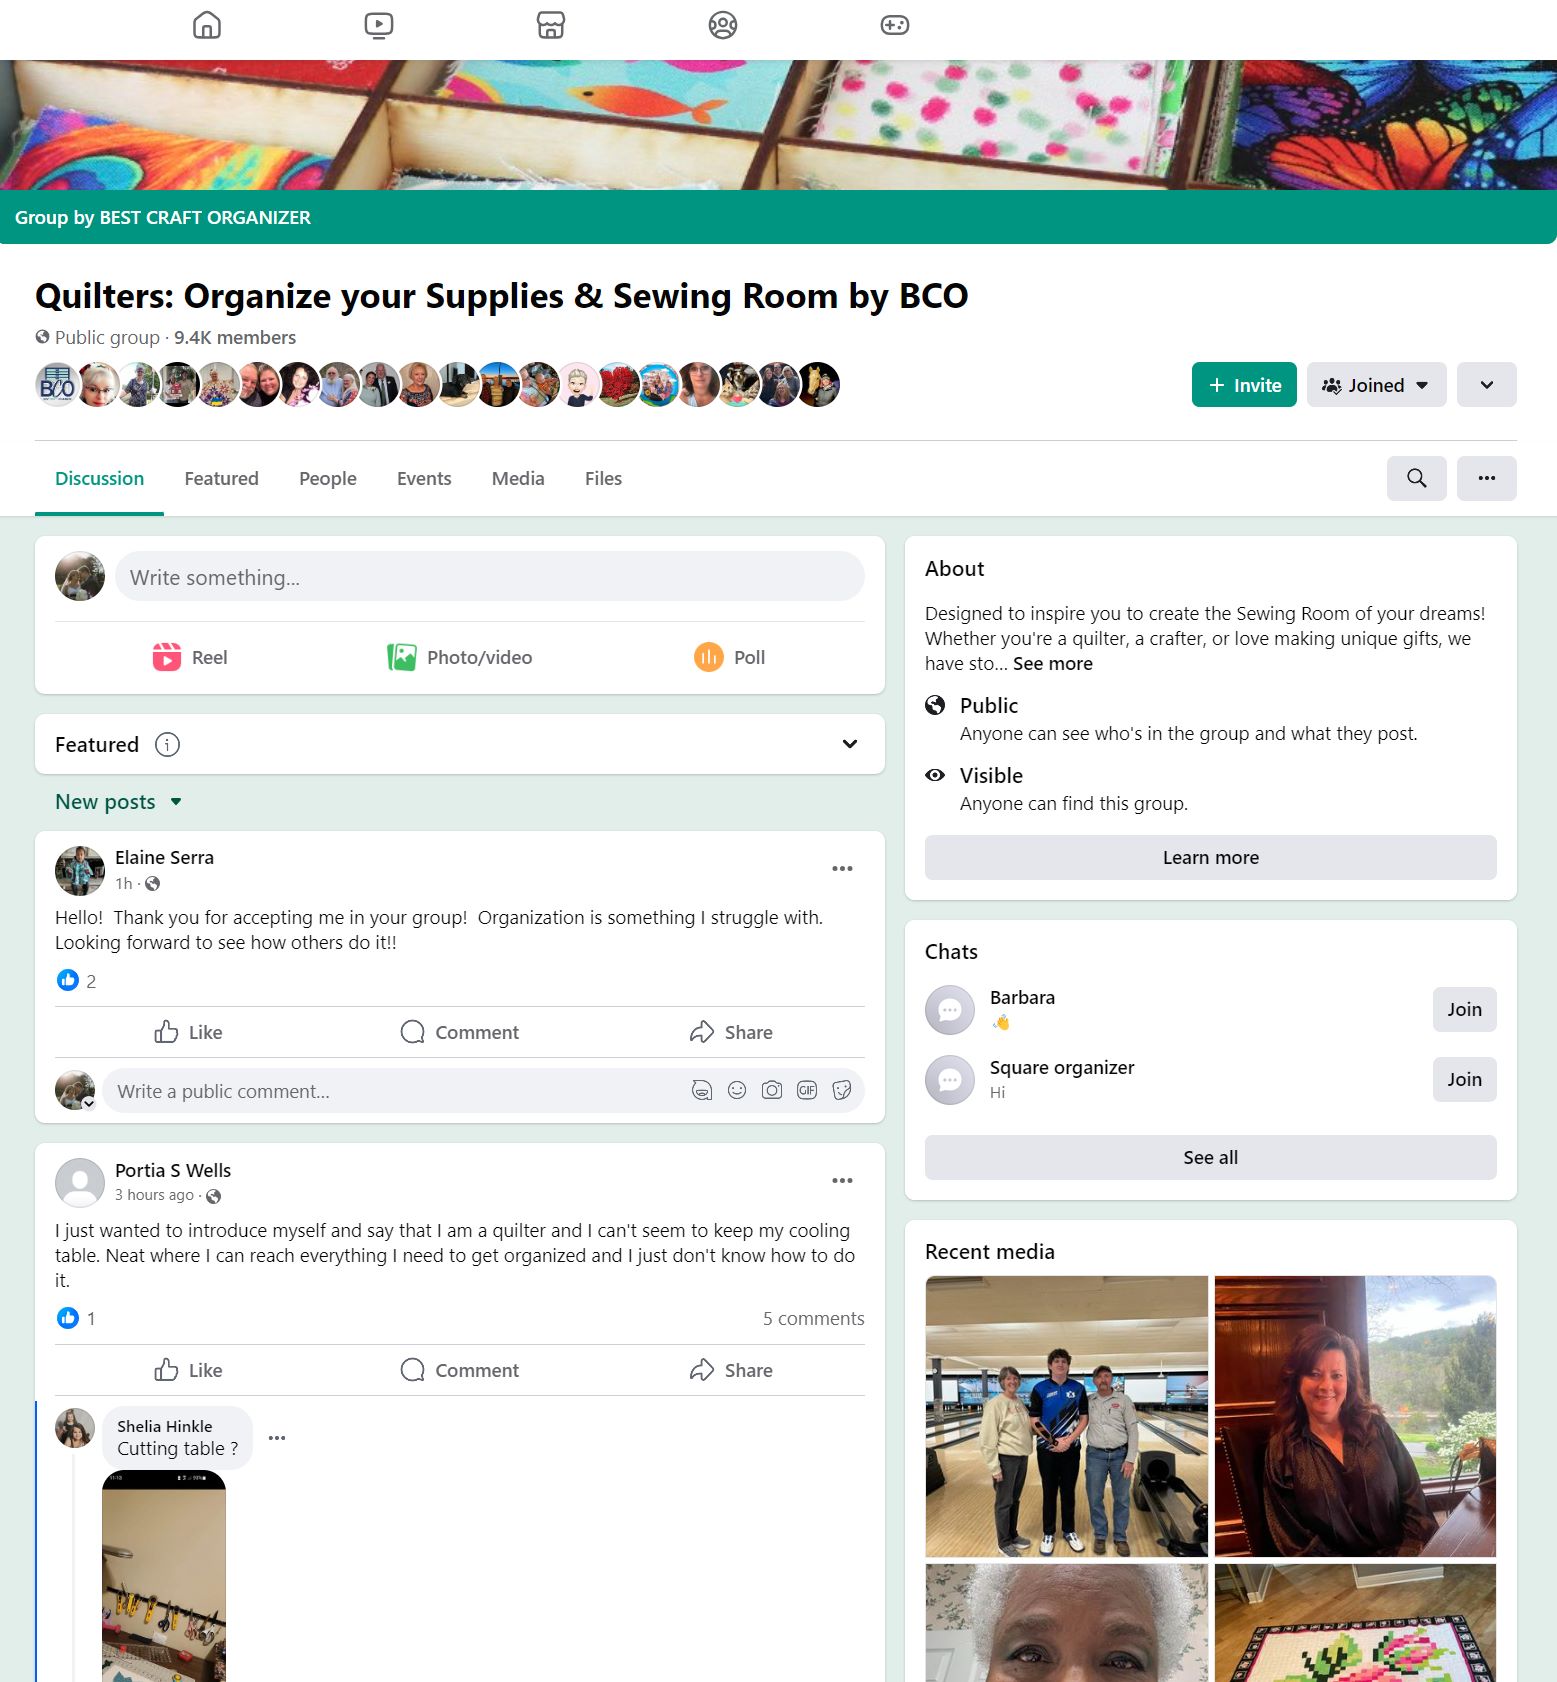
- Facebook Groups. Chances are you probably have a Facebook account. That’s awesome because so do a lot of other people and they want to connect with you. There are a lot of different Facebook groups dedicated to crafters, their craft, and their craft spaces. Best Craft Organizer has a couple of different Facebook groups dedicated to that.
- Paper Crafters: Organize Your Craft Space & Supplies by BCO
- Quilters: Organize Your Supplies and Sewing Room by BCO

Decide What Your Requirements Are
What type of supplies do you have? Are you a paper crafter, quilter, knitter, or all of the above? Do you have a lot of stickers that need a place to be organized? Do you sew and have a sizable collection of fabric? Or are you someone who knits and would like a room where you store your yarn and needles and have a cozy place to sit? You may enjoy all three crafts and want a room with a layout that meets the needs of those crafts. Think about what you love, want, and need.
A list of requirements could look like this:
- Comfy chair
- Shelf for knitting supplies
- Desk for scrapbooking
- Spot for TV
- Area for guest bed
Once you know what your requirements are, you can start planning.
Plan Your Room Layout
For most, this is the fun part, putting your plans into action. You have found your inspiration, decided on your requirements, and can begin planning your layout.
If your room is longer than wide, use all that wall space to your advantage. If you have sloped ceilings, use shelves that are not very tall. If you have a lot of windows, place your desk in front of the windows to utilize all the natural light. You get the idea. Rather than being discouraged by the challenges of your craft room, lean into those unique elements.
Planning Steps:
- Measure
- Start by measuring your room, considering any windows, doors, and built-in features. Measure the length, width, and height of the space.
- Define zones
- Decide what your primary crafts are, sewing, card making, knitting, etc. Create zones based on the crafts you enjoy or the supplies you have. For example, you might have a sewing table, where your sewing machine sits. You might have a stamp shelf for your stamps and a drawer for your card-making tools. Keep those zones near each other.
- Plan furniture placement
- Grab your graph paper, pencil, and rulers. Sketch out a layout for your craft room. Take into consideration the storage that you already have and any large storage pieces you plan to purchase; if you have other items you plan to keep in your craft room (for example, maybe your craft room is also a guest bedroom, create the floor plan that includes those pieces). It's also a great idea to use masking tape to lay your room out before purchasing furniture. This helps get a visual of space in the actual room.

- Invest in lighting
- Lighting will make or break your room. Good lighting can completely change your space and improve your experience when crafting. If your room has a lot of natural lighting, you may not need a lot of supplemental lighting, but if you enjoy crafting after the sun has set, consider what your lighting is like. A good quality lamp can help a lot. Look for a lamp with adjustable lighting, every lamp is different. Consider the temperature of the light, is it warm or cool? Can the temperature be adjusted? Do you want it to be adjustable? Do you want a lamp that is easy to adjust, can you change the height, direction, or position? Take all of these things into consideration when looking for a lamp.
- Organize your storage
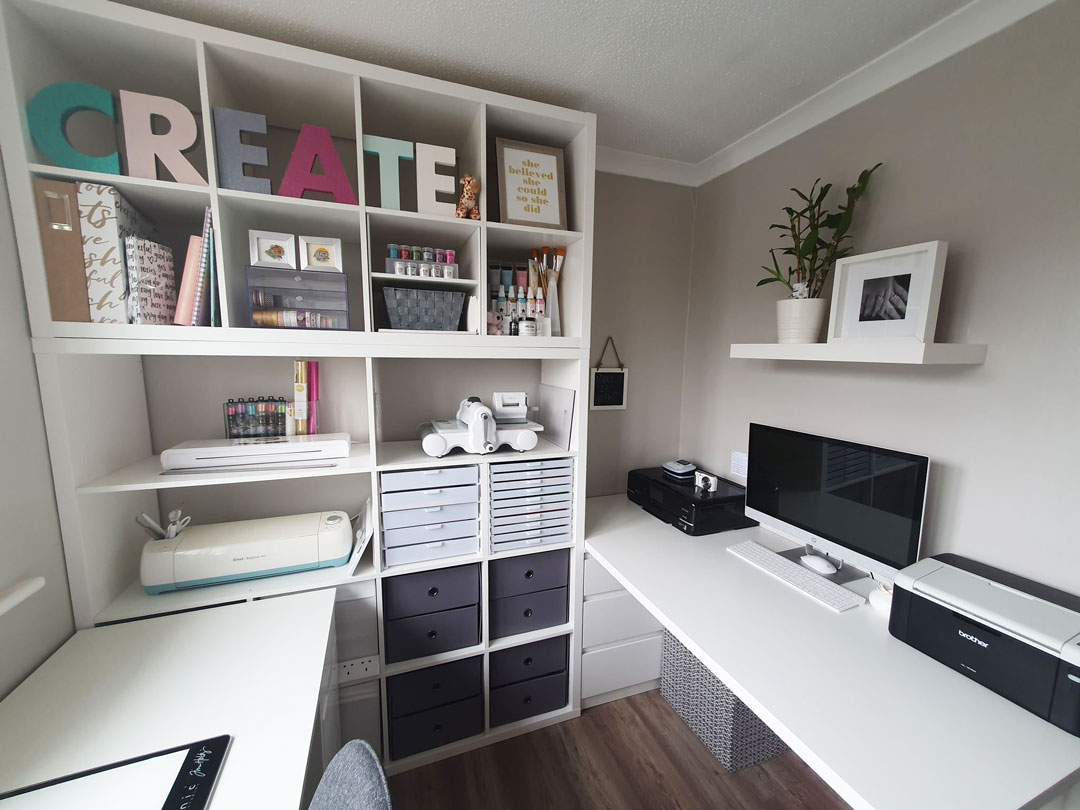
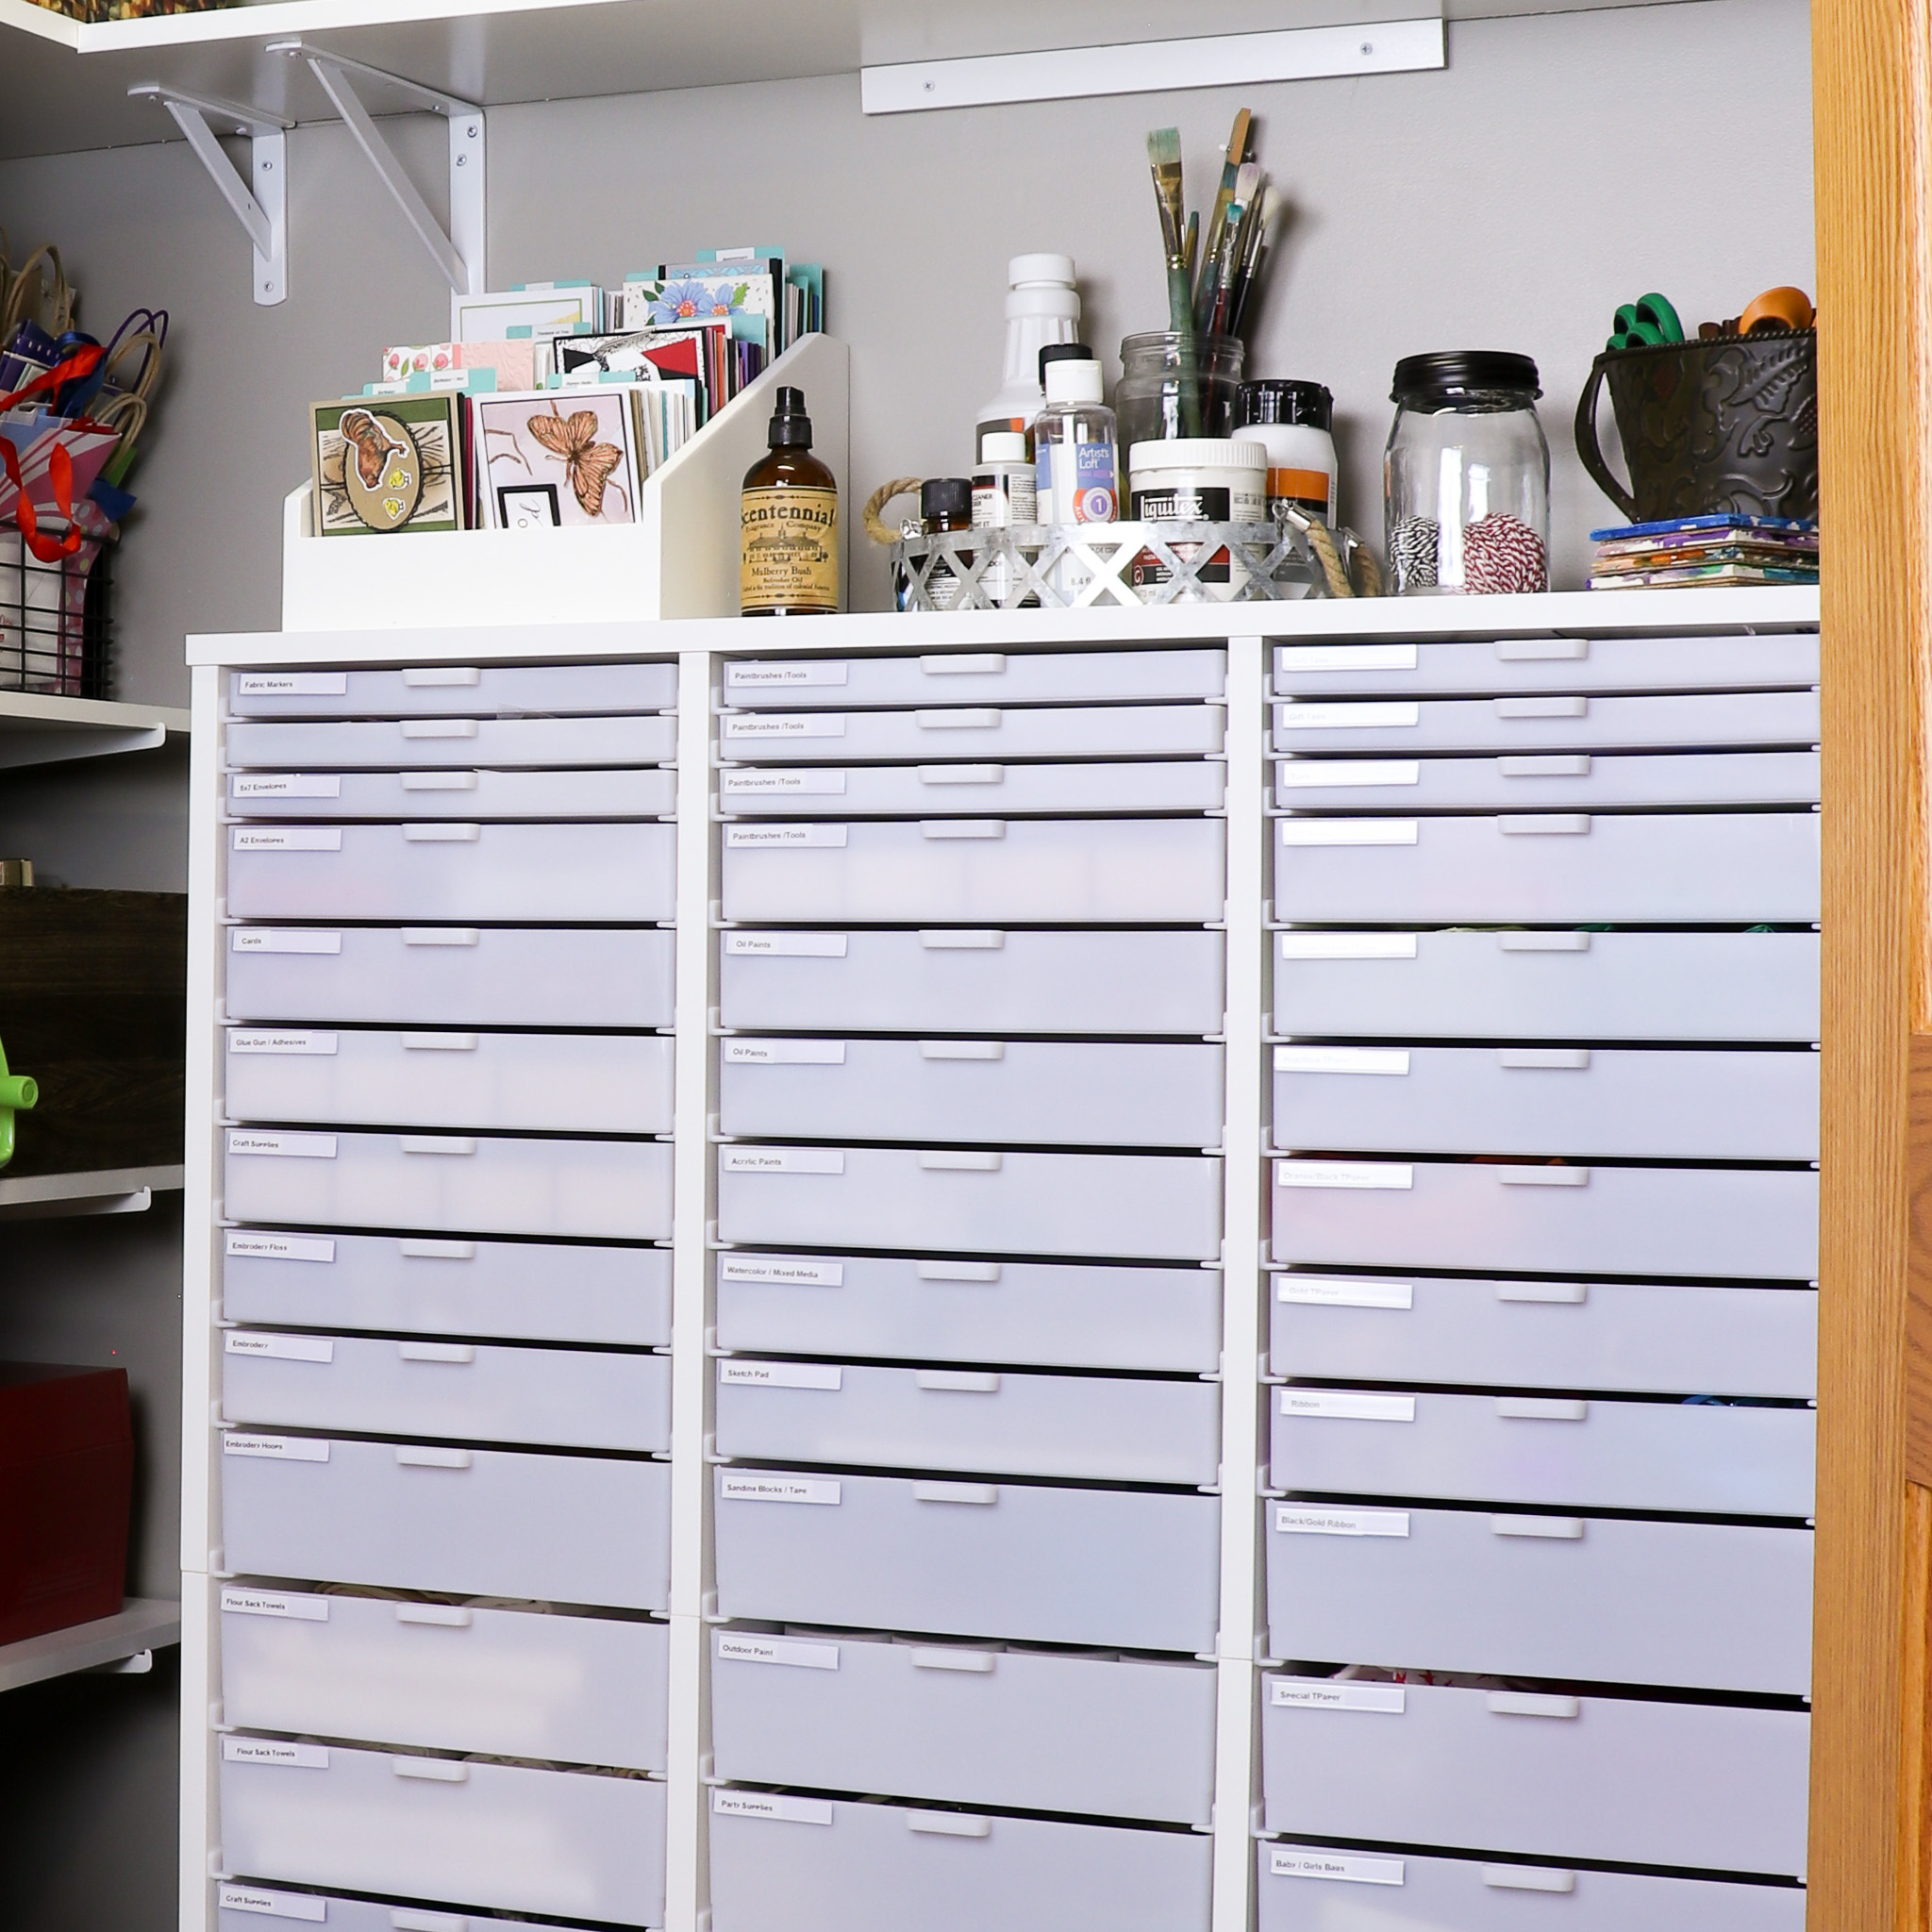
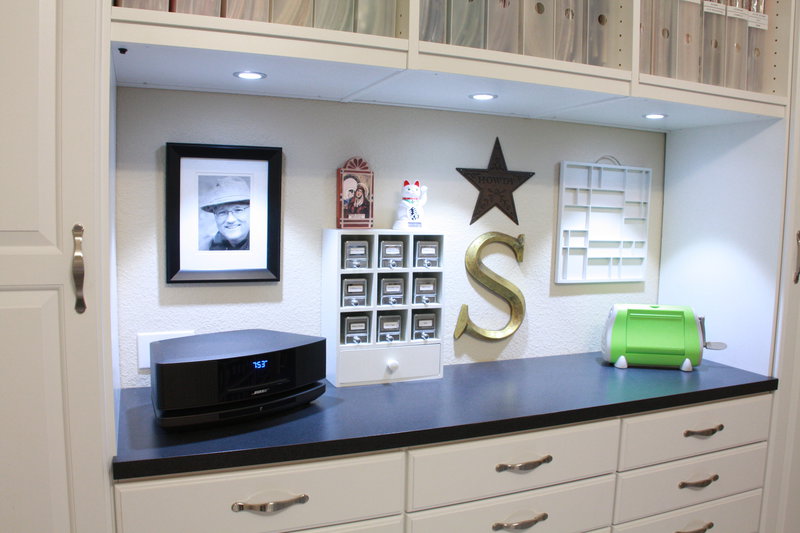
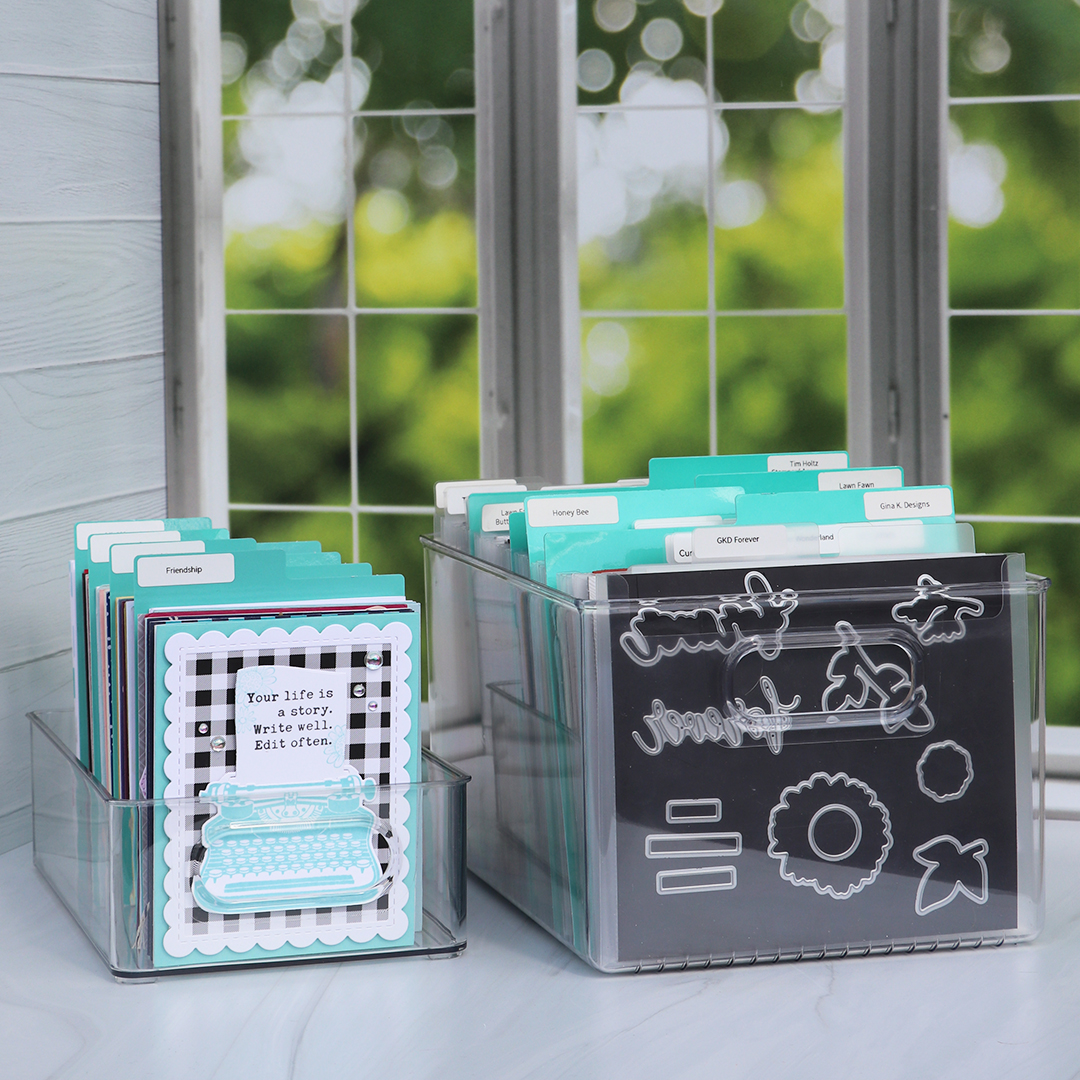
- This can look different for every crafter and in every space. What supplies do you have that need to be organized and stored? Our favorite ways to store supplies are in the BCO Cabinets, they are completely customizable to fit your space and your craft. Choose the height and width you want for your space, then decide what size drawers or paper shelves you want in your cabinet. If you have supplies like washi tape or embellishments, a Wall Box works perfectly to keep those items organized and easily accessible, while utilizing wall space. If you have a lot of stamps and dies, an Acrylic Crate with Magnet Cards is a simple solution for storing your stamps and dies. Use a Craft Caddy to hold your most used tools on your desk, within arms reach.

Create Your Workspace
Now that you’ve sought inspiration, decided what your requirements are, and planned out your space, you can start to create your craft room. Put all the pieces together and get crafting. The goal of your craft room is to have a space that is functional, maximizes space, and keeps your supplies organized. If you have those three things in mind while assembling your craft space then you will be able to unleash your creativity.

As you are planning your craft space, here are a few mistakes not to make.
Tips to avoid:
- Having too much on display
- Not leaving enough room for your supplies to grow
- Keeping things you no longer use or broken items
- Not using labels
- Choosing items that aren’t functional
Creating your dream craft room is an exciting endeavor that begins with inspiration and thoughtful planning. Whether your space is a perfect square, long and narrow, or has unique features like sloped ceilings or many windows, there are tips and tricks to maximize its potential. With a few steps implemented, you can create a space that reflects who you are as a crafter and gives you the freedom to unleash your creativity.