
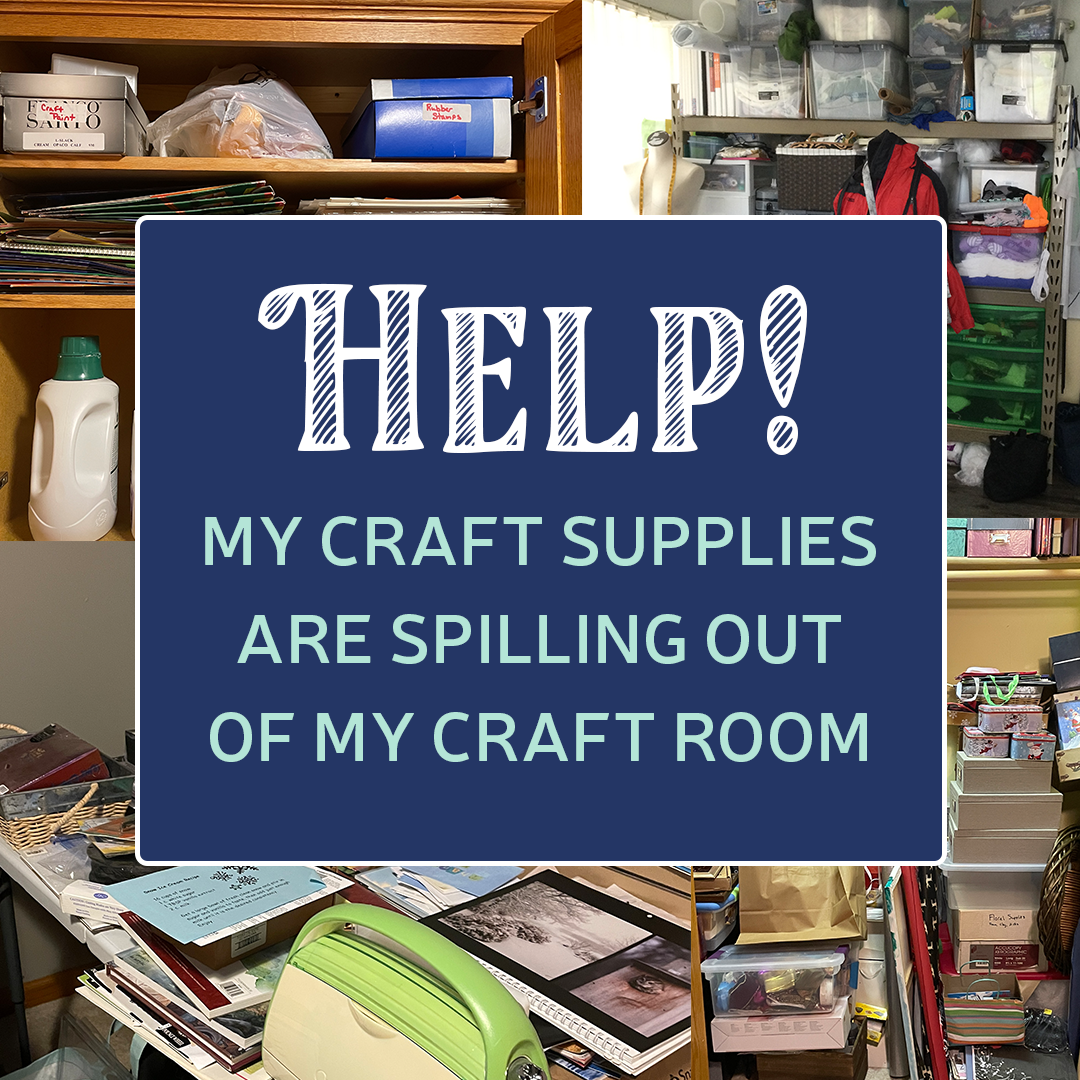
Are your craft supplies squirreled away all over your home? Are you starting with a mess of bins, totes, and cupboards housing your sewing and paper crafting supplies? Do you want to get organized but need to know where to start?
I am here to help. As an experienced crafter that spent 20-plus years without a dedicated craft space, I can relate to your challenge. I always put my family's needs first, so my area consisted of multiple cupboards scattered all over the house, which meant I never crafted. When I finally found the supplies I needed to make a card or scrapbook page, I was so frustrated that my inspiration left. I didn't want to give up my craft, so I made the commitment to dedicate a space in our home just for me. After all, my hubby got the garage, so why couldn't I have a room, right? Let me tell you, having my own craft space has sparked my creativity. Now, I can sit down and create when I have time to craft.
Are you ready to commit to your craft? Then, let's get started with this easy seven-step plan!
Step 1: Carve out an Area of Your Home to be Your Dedicated Craft Space
This can be a closet, a corner of a room, part of a basement, or a spare room. The critical piece of Step 1 is finding a space that is your own. Once you select your area, start to visualize how this space will look and work for you. What would be the ideal set-up to provide you with the necessary supplies to craft without frustration? View our Blogs & Crafty Spaces for inspiration for fabric organization, craft tables, paper or ink pad organization, ideas to stash embellishments, thread & floss storage, stamp sets, and wafer die storage.
Step 2: Assess Your Supplies, and Yes, Purge
Before you start organizing, take inventory of what you have and purge supplies you no longer need or no longer work (like dried markers and ink pads with no refills). This can be daunting, especially if they're spread all over the house. However, this will help you identify what you have and what you use most often. Start with your most used supplies and be sure to test markers to see if they are dried out or damaged.
Step 3: Sort Your Supplies
Once you know what you have, start sorting your collections into categories. For example, you might have a category for thread spools, fabric, ink pads, one for 12x12 designer paper, another for markers, etc. Make a list of your craft supplies, including how many colors of 12x12 paper, 8.5x11 cardstock, and 6x6 paper; the number of ink pads and markers by brand; embellishment types; adhesives; cutting tools; stamp sets and wafer dies; machines; and paper punches. A list of your craft supplies will be beneficial during Step 4 – Planning Your Space, when you purchase storage solutions to organize them.
Step 4: Plan Your Space
Using your inventory list of craft supplies and your vision for your space from Step 1, start planning your area. You can even use this free downloadable grid paper (PDF) to help plan your space:

Think about the overall flow and feel of the room:
- Do you want more than one work surface for different stages of your projects?
- Do the colors need to match your existing decor? Or can you start from scratch?
- Will the existing flooring and wall color work? Or will you need to change them before you add your storage systems?
- Is the lighting in your area adequate, or do you need to add task lighting?
Also, think about the function:
- What type of work surface do you want (length, width, height)? Style of desk or counter surface?
- What supplies do you use the most that you want within reach and visible?
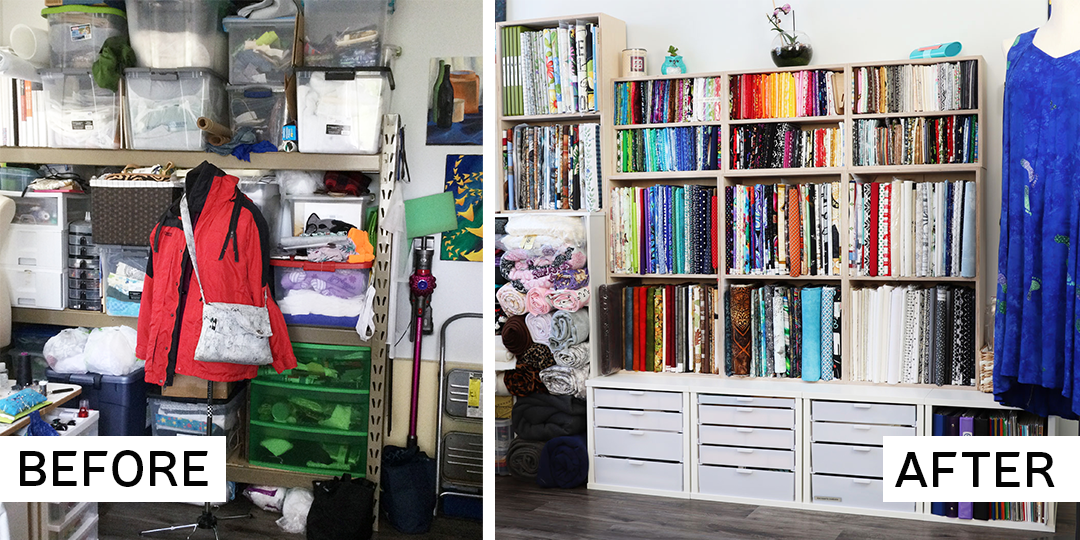
- Do you need storage for yards of fabric to keep it visible and easy to access? How about a Fabric Shelf -Yardage and a Fabric Shelf - Fat Quarters? These shelves not only allow you to display your fabrics in a rainbow of colors, they also keep you from purchasing duplicate material. Plus, the beautiful display will spark your creativity and cozy up your sewing space. Oh, and don't forget the Fabric Wrap Boards and Ruler Stand to complete your sewing room organization.
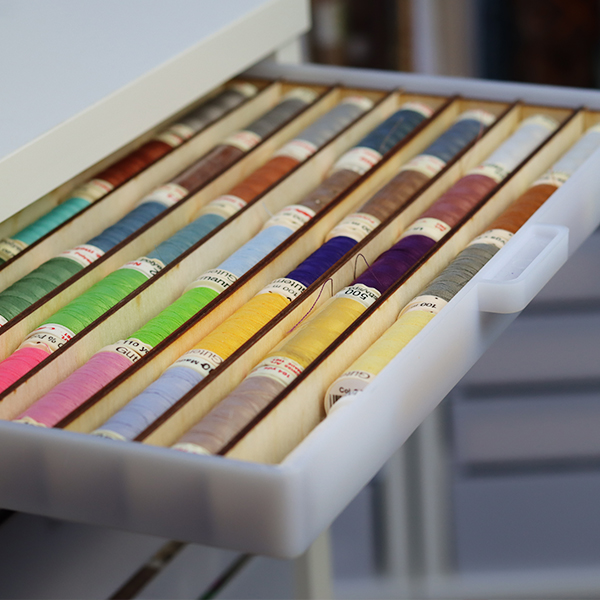
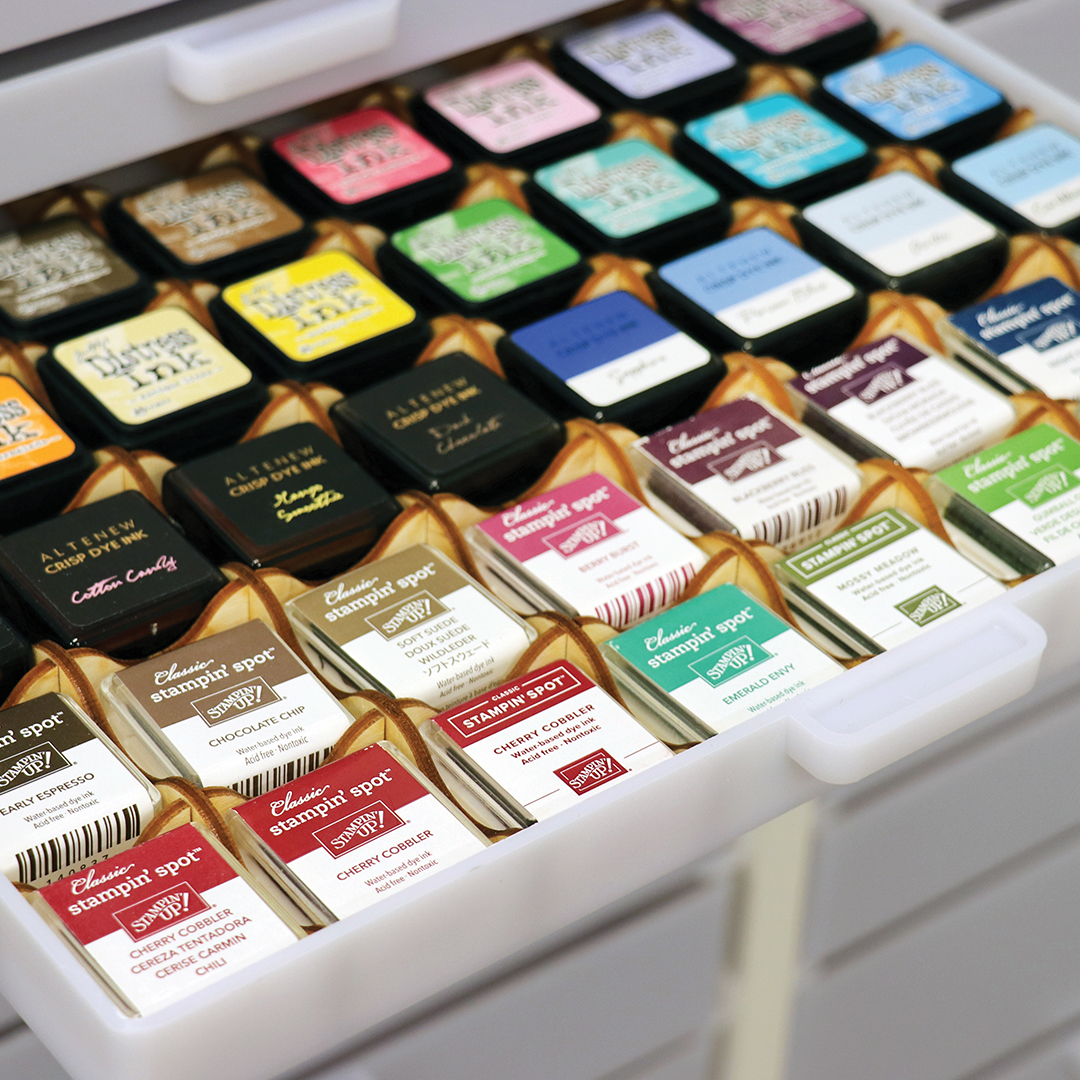
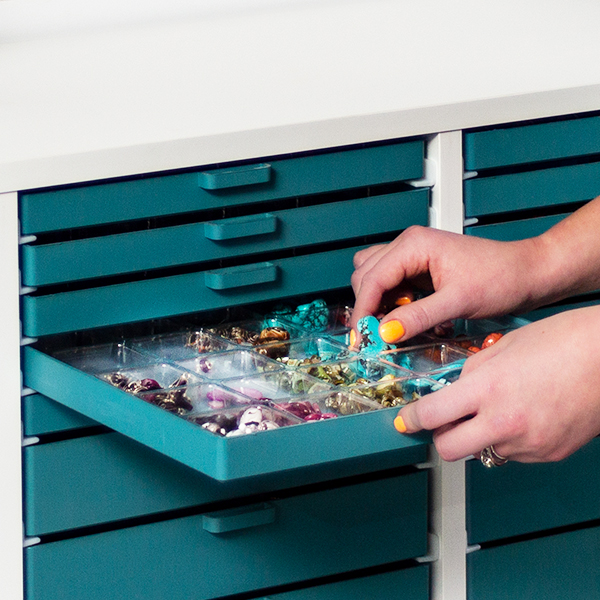
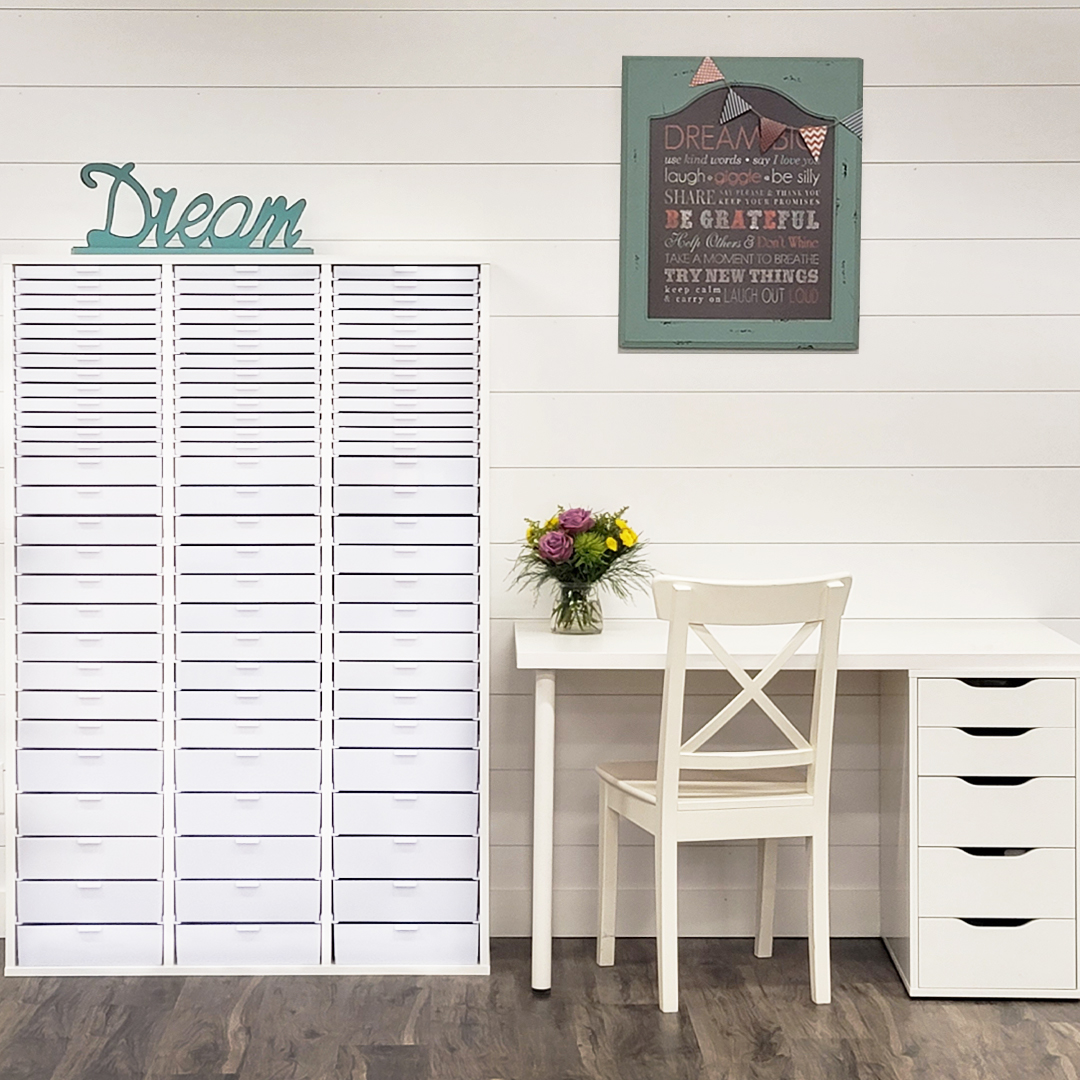
- What type of drawer storage do you need? Best Craft Organizer Storage Cabinets & Drawers offer a mix of deeper drawers for taller thread spools, embossing powders & pastes, ink refills, and smaller drawers for tiny embellishments, embroidery floss, watercolor paints, brushes, scissors, mini-ink cubes, etc. Do you need a set of longer drawers under your desk to store paper cutters, heat guns, glue bottles, adhesives, and rulers? Don't forget Accessory Trays, Half Trays, Mini Ink Cube Holders, Thread Grid Storage Systems, Fabric Grid Storage Systems, and Grid Storage Systems to manage the supplies inside your drawers.
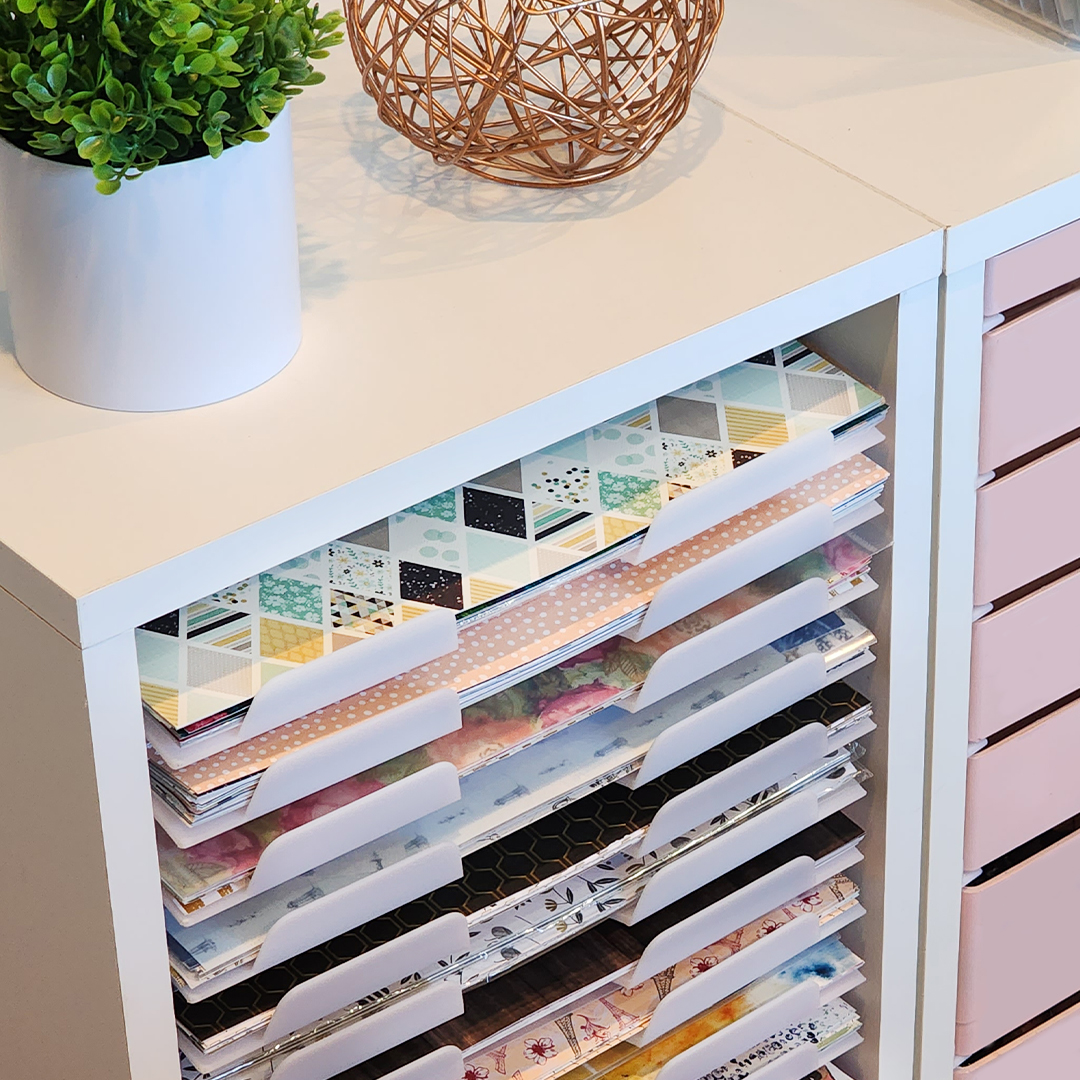
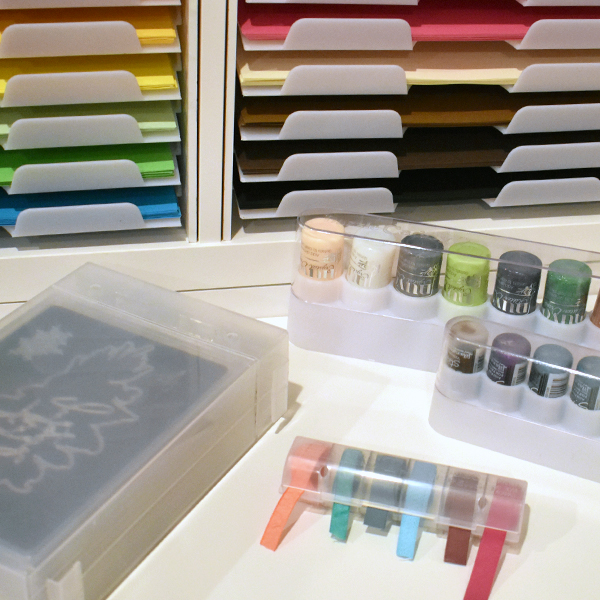
- How do you want to organize your paper? Consider Best Craft Organizer Paper Shelves in a Storage Cabinet, Storage Cube, or Storage Add-on for IKEA. Another excellent solution for scrapbook paper is the Paper Crate. These storage solutions are designed to fit any space and will tackle your paper storage needs.
- What about storage for washi tape, ink pads, markers, beads, stamp sets, and wafer dies? Check out all the handy storage solutions for Card Making & Scrapbooking, and Beading & Jewelry-Making.
Once you have thought through the flow and function of the space, draw out a plan and put together a To-Do List for the tasks you need to complete to make your area a reality.
Step 5: Execute the Plan
It is so exciting when your vision evolves. Enjoy this process.
Step 6: Label Your Supplies
Labeling your supplies is a great way to keep them organized and easily accessible. You can use labels, tags, or even a simple index card with the name of the item and the category it belongs to.


Step 7: Keep it Tidy
Finally, make sure to keep your craft supplies in their designated spot. This will save you time and energy in the long run, and it will also make it more enjoyable to work on your projects.
Designating a workspace and organizing your craft supplies may seem daunting, but by following these simple steps, you can quickly get your supplies in order and make the most of your creative time. Whether you're a seasoned crafter or just getting started, a little organization can go a long way in helping you achieve your crafting goals.
Creating my craft room was challenging. It wasn't easy communicating my vision for my space to my husband or convincing him to go to IKEA with me to pick up my desk and Kallax unit (a promise for pizza after helped.) But I stuck to my plan, and now I have a wonderful retreat right in my home. The best part is that my craft room organization put all my craft supplies at my fingertips, making it so easy to unleash my creativity.
Nancy